Annotate Your Own Dataset
LabelImg - Annotation tool for object detection
To annotate a dataset, application like LabelImg can be used. Go to https://tzutalin.github.io/labelImg/ and download windows_v_1.8.0 (For windows OS), extract it.
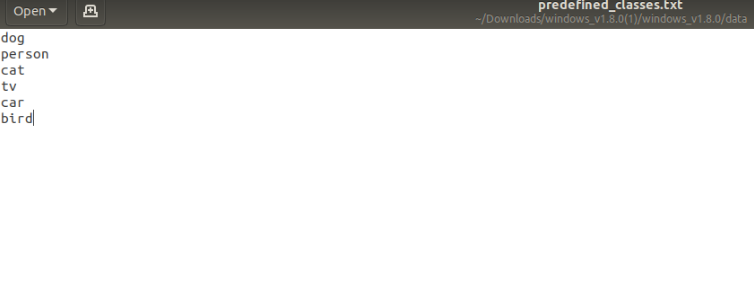
Open ‘data/predefined_classes.txt’ file and add labels that are going to be annotated.
Double click ‘labelImg.exe’ to launch the application.
In the left side panel,
Once ‘Open Dir’ is selected, all the images inside the directory are available to annotate
Press ‘w’, drag the cursor around an object in the image and select the appropriate annotation. Press ‘w’ again to annotate another object in the same image.
Press ‘Ctrl+S’ to save the annotation and ‘Next Image’ to annotate next image.
All the saved annotations will be available in the form of XML files in the directory chosen for ‘Change Save Dir’.
Hardhat Dataset
The dataset can be downloaded from https://dataverse.harvard.edu/dataset.xhtml?persistentId=doi:10.7910/DVN/7CBGOS and it is about detecting whether a person has worn a hardhat or not. It is annotated with 3 labels - head, helmet, person. ‘Person’ is only labelled for few images and it is also not relevant as we just want to detect whether a person has worn a hardhat. Hence we only consider 2 labels - head, helmet.
YOLO is originally implemented in darknet which is an open source neural network framework written in C and CUDA. Later, it is implemented in other libraries like keras, pytorch, tensorflow. The following analysis is implemented in keras using the github repository https://github.com/experiencor/keras-yolo3
Train the model
Training the model on a CPU is extremely slow, hence GPU is preferred. Google’s Colab provides a free GPU which you can access with a gmail account and the UI is similar to Jupyter notebook.
Clone the keras-yolo3 repository from github
!git clone https://github.com/experiencor/keras-yolo3.git

cd keras-yolo3
Pretrained Weights
Download the pretrained backend weights file backend.h5 from https://drive.google.com/drive/folders/1pQNZ9snByUOMjvEf7Td8Zg1qvBAVhWZ8 or ‘Add shortcut to drive’ for training on google colab
Update line 163 in train.py with backend.h5 location
...

else:

   template_model.load_weights("/content/My Drive/backend.h5", by_name=True)

...
Install the requirements
!pip3 install -r requirements.txtconfig.json
Update the config.json file
{

   "model" : {

       "min_input_size":       288,

       "max_input_size":       448,

       "anchors":              [55,69, 75,234, 133,240, 136,129, 142,363, 203,290, 228,184, 285,359, 341,260],

       "labels":               ["head", "helmet"]

   },


   "train": {

       "train_image_folder":   "/content/drive/My Drive/hardhats/Train/JPEGImage/",

       "train_annot_folder":   "/content/drive/My Drive/hardhats/Train/Annotation/",

       "cache_name":           "hardhats_train.pkl",


       "train_times":          8,

       "batch_size":           8,

       "learning_rate":        1e-4,

       "nb_epochs":            100,

       "warmup_epochs":        3,

       "ignore_thresh":        0.5,

       "gpus":                 "1",


       "grid_scales":          [1,1,1],

       "obj_scale":            5,

       "noobj_scale":          1,

       "xywh_scale":           1,

       "class_scale":          1,


       "tensorboard_dir":      "logs",

       "saved_weights_name":   "/content/drive/My Drive/hardhats/hardhats.h5",

       "debug":                true

   },


   "valid": {

       "valid_image_folder":   "",

       "valid_annot_folder":   "",

       "cache_name":           "",


       "valid_times":          1

   }

}
Update “train_image_folder”, “train_annot_folder” with the locations of images and annotations. “Saved_weights_name” is the location where the model is saved after each epoch and also the same model will be used if the training is restarted after any interruptions. If there is ‘out of memory’ issue while training, try reducing the batch size.
Train
!python3 train.py -c config.jsonOn Google Colab, it took about 15 hours to train the model. If there are any interruptions, the training can be continued from the last saved model.
Detection on Image
!python3 predict.py -c config.json -i '/content/drive/My Drive/hardhats/Test/JPEGImage/005297.jpg'
Real Time Detection
Objects can be detected in real time by passing the video stream to the model. OpenCV can be used to access the webcam stream
cv2.VideoCapture(0)Instead of video stream from a webcam, a video file can also be used to simulate real time detection similar to webcam
cv2.VideoCapture(‘video.mp4')Change line 39 in the file predict.py to generate video stream from a file or leave it as it is to detect objects from a webcam
...

if 'webcam' in input_path:

   video_reader = cv2.VideoCapture(‘video.mp4')

...
The below command will start the detection using webcam stream
!python3 predict.py -c -i 'webcam' IP Camera
Instead of web camera or a file, video can also be streamed from an IP camera using its IP address
#cv2.VideoCapture(<ip address>)

cv2.VideoCapture('http://192.168.1.1/video')


#If there is username and password to access the video

#cv2.VideoCapture('http://username:password@192.168.1.1/video')