Step1.
First, you need the Python 64-bit version. It is highly recommended to use the 64-bit Python version.
Get the latest Python version
https://www.python.org/downloads/windows/
Get the Python 3.7 version(Latest version while writing this post)
https://www.python.org/ftp/python/3.7.0/python-3.7.0-amd64.exe
Install the downloaded python by clicking next and next.
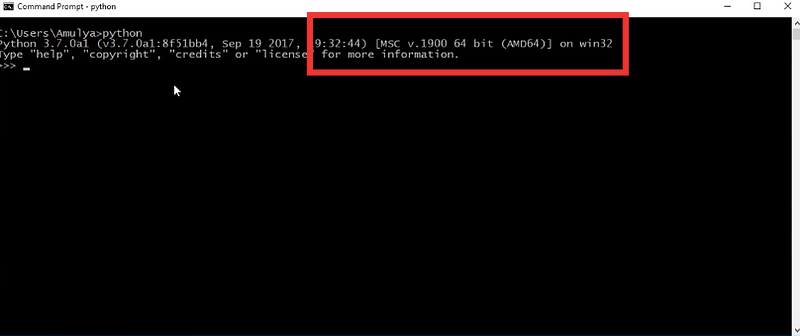
If you have python already installed, you can check the bit of the python by typing python in cmd.

 https://miro.medium.com/max/690/0*Q3r0JPlQwrj9qGVa.png 552w, https://miro.medium.com/max/800/0*Q3r0JPlQwrj9qGVa.png 640w, https://miro.medium.com/max/875/0*Q3r0JPlQwrj9qGVa.png 700w" alt="" width="700" height="294">
In the above picture, if it shows 32 bit on your machine, then you must uninstall 32-bit python and install python 64-bit version.
Step2.
Install the pip, if you don’t have it on your machine.
Get pip file using
https://bootstrap.pypa.io/get-pip.py
Save the above file and execute the file using
python get-pip.pyNow you have installed the pip.
Step3.
Get Python XGBoost whl file using below link
https://www.lfd.uci.edu/~gohlke/pythonlibs/#xgboost
I have installed Python 3.7 64-bit version choose xgboost-0.81-cp37-cp37m-win_amd64.whl file.
https://download.lfd.uci.edu/pythonlibs/r5uhg2lo/xgboost-0.81-cp37-cp37m-win_amd64.whl
Make sure to match your python version and system architecture, e.g. “xgboost-0.81-cp37-cp37m-win_amd64.whl” for python 3.7 on 64-bitmachine
Step4.
Install the downloaded XGBoost Python whl file using below command.
pip install xgboost-0.81-cp37-cp37m-win_amd64.whlThat’s all. You have successfully installed XGBoost on your Windows 10.
Step5.
You can import the XGBoost package to test. Open any python editor and type below code
import xgboost as xgbxgboost‑0.72‑cp36‑cp36m‑win_amd64.whl from Here (as I am using Python 3.6 if you use different version of Python like 2.7 then you need to install xgboost‑0.72‑cp27‑cp27m‑win_amd64.whl).File -> Settings -> Project Interpreter from Pycharm.pip install xgboost-0.72-cp36-cp36m-win_amd64.whl


